Welcome back to The Shak.
Yes, it has been a while. I've been busy doing the actual work about which I blog. Today, I will show you how I build rabbit cages. Rabbits grow quickly. I will be keeping two does and one buck from each of the two litters. This means six new breeding cages.
 |
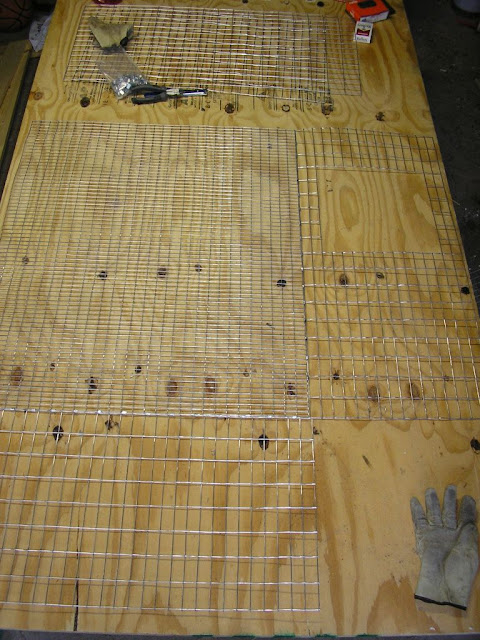
| A large, sturdy work area is vital |
Get yourself a good diagonal wire cutters. A thin nose is good as it allows you space when cutting close wire. Do not use a needle nose pliers. If you need a reason...try it, you will find one when you begin to cut the first floor piece from the roll. I cannot stress enough the importance of the wire cutter. Having built other cages with a sub-standard (made in China) cutter, I gladly bought an American made, American steel, cutter with a comfortable handle. It is necessary that the cutter be made of harder metal than that which you are attempting to cut. DO NOT PURCHASE CHEAP TOOLS! You will pay in other ways. BUY AMERICAN. BUY LOCAL.
 |
| The requisite tools and fasteners |
I have no photos of cutting wire. Suffice to say, I cut six of each tops and bottoms (36" x 30"), fronts and backs (36" x 16") and twelve side (30" x 16") pieces. A door hole distinguishes the fronts from the backs. The type of wire used indicates top or bottom. All twelve sides are the same.
Eight or so hours later...you have all the pieces cut. It is time to put it all together.
 |
| There is going to be a lot of this |
 |
| Lay the front over the floor and clip them them together |
 |
| Floor with front and one side fastened. |
 |
| Floor with front, one side and a corner. |
 |
| Front, one side and the back with two corners. |
 |
| All four sides in place. |
 |
| Put the door in before installing the top. It is just plain easier. |
 |
| One finished cage. |
Depending upon what kind of feeder and waterer you use, further cuts may be required during installation.
 |
| 5" in the world of wire, is not equal to 5" in the world of feeders. Wire bends to fit. |
 |
| 5" rabbit feeder in place. |
Also, if you make a bad cut, do not freak out. Wire bends. You will be able to adjust. A perfect cage keeps in what one wants in and out what one wants out. Imperfect corners or a ripple here and there will work themselves out once the weight of the rabbit is on the floor.
I made hay racks from the wire pieces I cut out of the front for the door opening. These too I fixed with clips to the exterior of the cage.
 |
| On the right is the wire removed to make the door hole. One the left, that same wire in a useful shape. When bending wire, use a needle-nose pliers. |
 |
| The hay rack fixed to the cage. |
hi, I got a question only, Did you weld all the wires together to stick wire with wire for doing the 4 sides fences?
ReplyDeleteI haven't soldering machine....
thanks 4 the post!!!
This is a GREAT demonstration/explanation of proper wire cage assembly.
ReplyDeleteI found it to be excellent! One suggestion, you can make
excellent two liter water bottle holders out of excess cage wire.
Very Nice Blog! Your blog is very helpful for one who wants to build rabbit cages. There are many species which are loved as pets amongst which rabbits are adored by many pet lovers. One can buy Best Rabbit Hutch for providing them with the best comforts. Thanks for sharing.
ReplyDeleteBut what a horror!!! How can you make a rabbit live in a wire cage? The wire mesh hurts their legs and body when they lie on it. A rabbit needs space to run, jump and hide. Your cage is torture and locking a rabbit in it is abuse.
ReplyDelete