Welcome back to The Shak.
I am quite excited about this post. It has been a long time in the making. Of course, I do the work before I do the post; although, in this case, because the post is very long and it is stupid hot outside again, I am writing before the work is entirely finished.
I do not know exactly when all this began. It was an idea for some time. It became a design when I drafted a picture of the idea. After collecting the materials, almost everything came from one pile of junk or another on the property, I made it a reality. “What is it?”, you ask. It is a market cart.
 |
| I drew this when I was ready to begin turning an idea into a reality. |
I will leave it, for the most part, unattended. Prices will be clearly marked on all produce. There will be a “cash hole” in which to put the money. It is “on your honor”. There may not always be produce available, but I will have pricing and contact information for rabbit products, chicken eggs and whatever else I happen to come up with as time goes along and for health reasons cannot sell off the cart. If you want something that is available but not kept on the cart, simply call the phone number, and if I am on the property and can fill your order, I will fill your order right away. If I am off the property, I will set up a time for pick-up.
All that having been said, let us get on with the fun.
 |
| I began with this. |
 |
| Plywood deck gone. The chain hoist made this much easier than it could have been |
 |
| Useful parts |
 |
| Pretty nice to have a couple of these lying around |
 |
| Wheels and axle together |
 |
| Riser parts ready to be welded. |
 |
| Riser bolted to bearing. The bolt securing the wheel can be seen in the background. |
 |
| Leaf springs and side-rails |
 |
| Leaf spring and side-rail D-bolted to the riser. |
 |
| Both springs and side-rails in place. |
 |
| Materials ready to be welded into a post sleeve. |
 |
| Welded and ready for installation. |
 |
| Forward post sleeve welded to side-rails. |
 |
| Both post sleeves installed. Looking from what will be the back |
 |
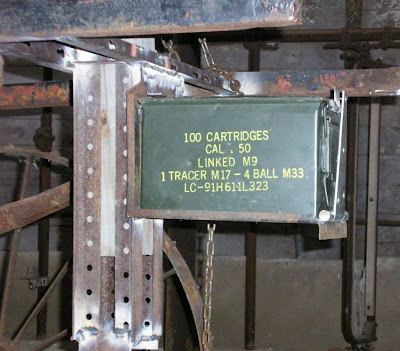
| Jeep Cherokee battery tray with hinge and ammo box. |
 |
| Tray welded to the front of the front post sleeve. |
 |
| The cash box |
 |
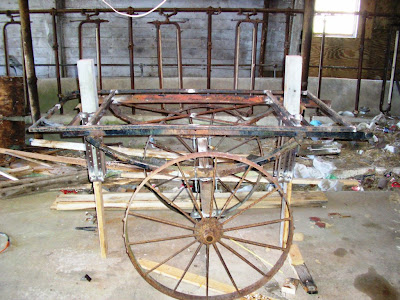
| My rusty pile of mess with deck frame, a.k.a. "the rectangle" in place. Yes, it is tough to tell what is going on. |
 |
| This should help clear it up for you. For the first time, it looks like something. |
 |
| The five pieces that will make up one roof post. |
 |
| The holes are drilled and outboard plate and hardware are ready. |
 |
| Detail of tops of roof posts. The close one is the outboard side. The far is the inboard side. |
 |
| Roof posts in post sleeves and cross post in place. |
 |
| If you look closely, you can see the roof slat spacers between the bottom two slats on the near side. They await my getting two more furring strips. Rookie mistake. |
 |
| You see how much better it looks from the finished side. There is still work to be done; however, this is a blog post not a Russian novel. |
Thank you for stopping. Come again soon.
great idea!I was searching online for any thoughts on carts as I have to make one and this is fantastic-using existing material,etc and it looks great.I will also be trying to use what I have on hand-wish I had those wheels-will need to find some from somewhere or I will use bike wheels but will need to make frame lighter than yours.It inspires me to get mine going.I too need to sell a few things while not at site and with honor system will have sides and possible 2 axle system but this gave me good ideas for the build.Thanks a lot.
ReplyDelete