Welcome back to The Shak.
Today I busied myself with installing three of the rabbit cages I built last week. I have a scheme in mind; whereby, I will mount the the six cages in two rows of three. The idea is to mount the top row to the wall, suspend the bottom row from the top row and put in "plumbing".
By "plumbing" I mean a system which removes all urine to a removable/cleanable container and collects the droppings for use in the the yard and garden. This will make for easy cleaning and much less work than the store bought drop pans I am using under the existing cages. In turn, it will also reduce ammonia, flies and general filth. Healthy rabbits are happy rabbits.
My first mission is to fabricate "L" brackets upon which to secure the top row of cages. That is what I will be showing you here.
This project requires the use of power tools most people just do not have. It would be cost-prohibitive for those without the tools. So I don't suggest running out and purchasing a welder, chop saw, grinders, clamps....etc, etc just to do this project. That having been said, you may discover something of value in this anyway.
I collect bed frames (angle iron). People throw them to the curb on garbage day. These things are gold! If you see a mattress on the curb, stop and see if there is a frame too. Grab it! My stock is low. Actually, one can never have enough materials. Most of the bed frames used on this project came courtesy of my friend Mike. Thanks Mike.
Bed frames usually come with all kinds of junk attached. Which makes sense for those who use them as bed frames. I remove all this stamped metal. If I can get at rivets and studs with the hand grinder, the work is quick. Those that I cannot get at that way I attack with my drill press, punch and ball peen hammer.
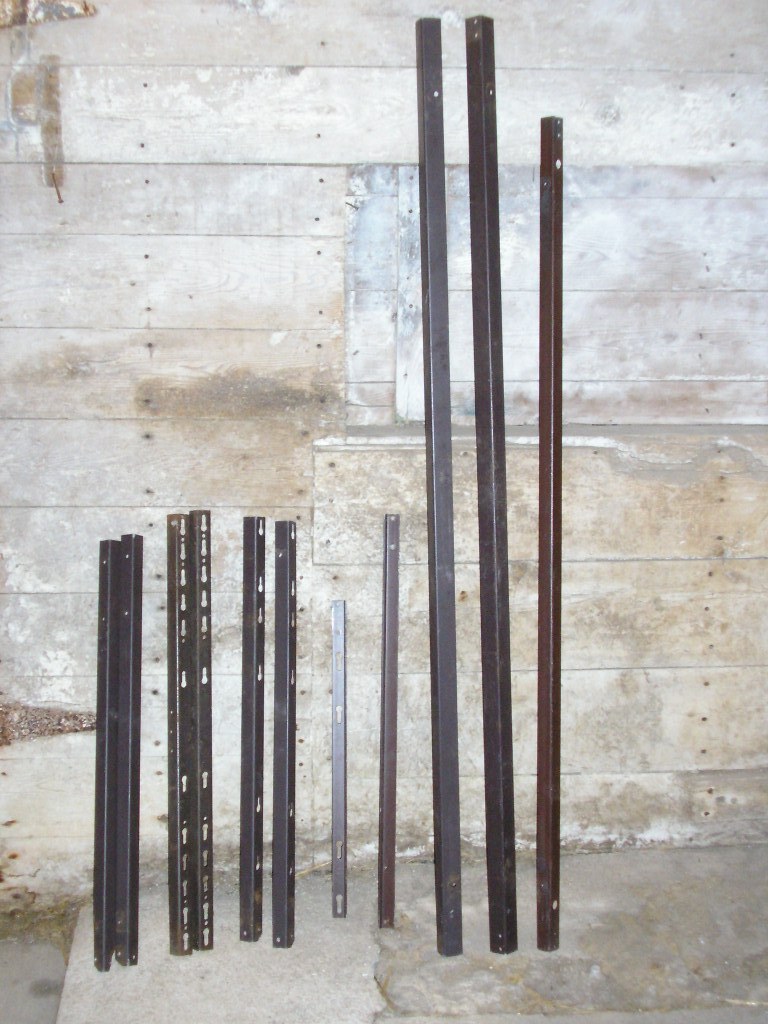
Once all the stamped pieces are gone, one has angle iron. This is more than enough for this project. I cut two 34" pieces into four 11" and two 12" pieces. These will eventually be screwed to the wall.
The cages are 30" deep. I cut six 33" pieces of angle iron. Two for each cage. They are 33" because I want the cages to have a 3" airspace on the back side.
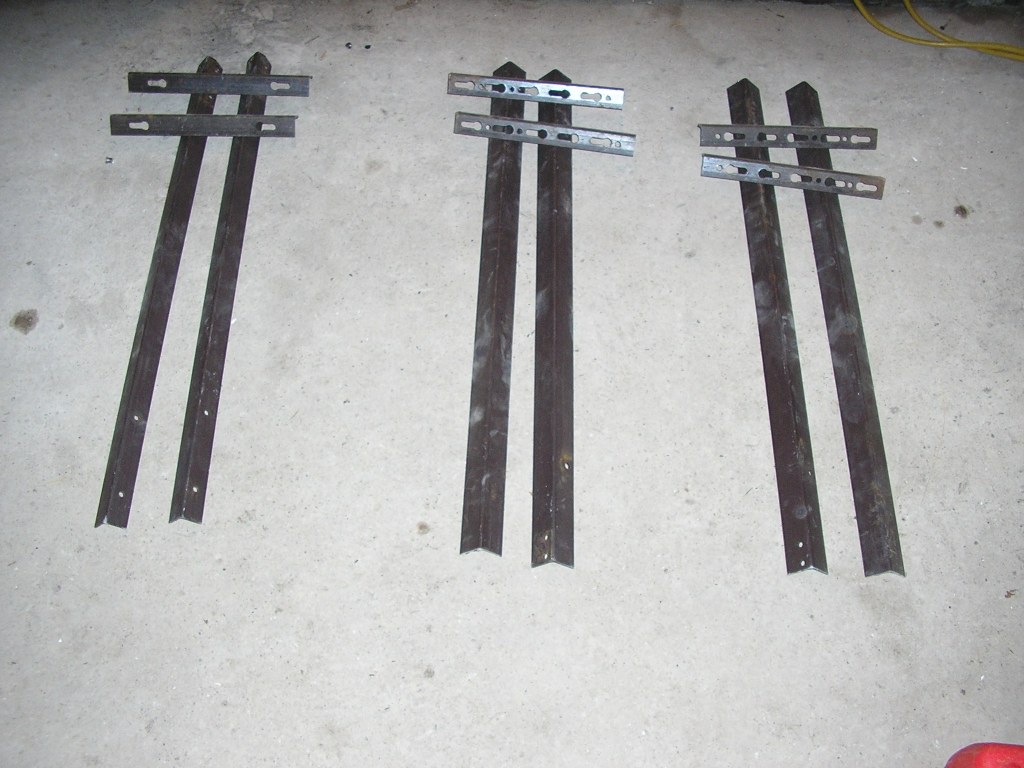
I did not do any fancy cutting. All cuts were straight chops with the chop saw. I simply overlapped the corners of the two pieces. Before you clamp them, be certain that, when installed, the angles face in toward each other creating a ledge upon which to place a cage. In other words, create mirror images.
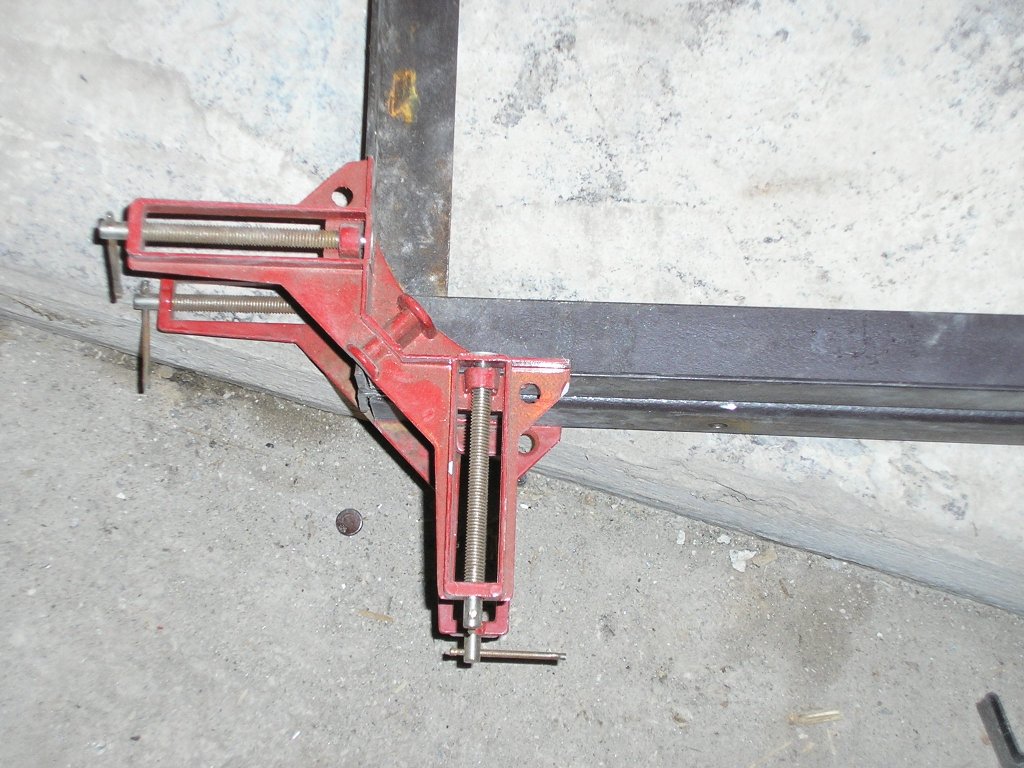
With the corners clamped in these nifty clamps, I tack welded the corner in two places. Having tacked all six brackets, I went back and completed the welds. I do not generally work on the floor. I neither like nor recommend it. The shop is "under construction". My welding tables are in storage. As a matter of fact, I spent the morning picking up my metal-working tools for this project. I got all the tools in the minivan; however, there is no manner of getting the tables in the van. Short of turning it into a convertible. The shop will not be complete until I commandeer a pick-up.
After running a level string where I wanted the bottoms of the cages to end up, I marked, pre-drilled holes and screwed the brackets to the wall. Pre-drilling is not usually necessary, but the wood into which I was screwing is just shy of petrified. I am thinking about selling it to China so they can make a few decent pairs of wire cutters.
Once all the brackets were secured, I cradled the cages between them. Then I wired the cages to the brackets. The next step will to hang the lower row of cages down from the brackets. And after some more planning, the "plumbing". Stay tuned.
Thanks for stopping. Come again soon.
Today I busied myself with installing three of the rabbit cages I built last week. I have a scheme in mind; whereby, I will mount the the six cages in two rows of three. The idea is to mount the top row to the wall, suspend the bottom row from the top row and put in "plumbing".
By "plumbing" I mean a system which removes all urine to a removable/cleanable container and collects the droppings for use in the the yard and garden. This will make for easy cleaning and much less work than the store bought drop pans I am using under the existing cages. In turn, it will also reduce ammonia, flies and general filth. Healthy rabbits are happy rabbits.
My first mission is to fabricate "L" brackets upon which to secure the top row of cages. That is what I will be showing you here.
This project requires the use of power tools most people just do not have. It would be cost-prohibitive for those without the tools. So I don't suggest running out and purchasing a welder, chop saw, grinders, clamps....etc, etc just to do this project. That having been said, you may discover something of value in this anyway.
I collect bed frames (angle iron). People throw them to the curb on garbage day. These things are gold! If you see a mattress on the curb, stop and see if there is a frame too. Grab it! My stock is low. Actually, one can never have enough materials. Most of the bed frames used on this project came courtesy of my friend Mike. Thanks Mike.
 |
| One man's trash... |
 |
| ...is another man's treasure. |
 |
| Six pieces and the chop saw that cut them. |
 |
| Everything is cut and ready to be clamped. |
 |
| I bought these clamps at some freight store. Perfect corner every time. |
 |
| One of six mounted brackets. |
 |
| Three installed rabbit cages. Three awaiting installation. |
 |
| Two of three new cages with the original three in the background |
No comments:
Post a Comment