Welcome back to The Shak.
Yes, it has been a while. I've been busy doing the actual work about which I blog. Today, I will show you how I build rabbit cages. Rabbits grow quickly. I will be keeping two does and one buck from each of the two litters. This means six new breeding cages.
First, set up a sturdy work surface. Make it large and flat. I use a 4' x 8' x 3/4" sheet of underlayment laid over a couple old, garage caliber cabinets. Whatever you choose will be left scratched and gouged. Have a chair nearby. You will need it.
You will need wire...lots of wire. My cages measure 36"W x 30"D x 16"H. Each floor is a 36" x 30" piece of 16ga, 1/2" x 1" wire mesh. This job requires two 10' rolls. Two 25' x 36" rolls of 14ga, 1" x 2" wire mesh will make up the tops, fronts, rears and sides.
Get yourself a good diagonal wire cutters. A thin nose is good as it allows you space when cutting close wire. Do not use a needle nose pliers. If you need a reason...try it, you will find one when you begin to cut the first floor piece from the roll. I cannot stress enough the importance of the wire cutter. Having built other cages with a sub-standard (made in China) cutter, I gladly bought an American made, American steel, cutter with a comfortable handle. It is necessary that the cutter be made of harder metal than that which you are attempting to cut. DO NOT PURCHASE CHEAP TOOLS! You will pay in other ways. BUY AMERICAN. BUY LOCAL.
You will be working with wire. Get a well-fitting but not too thick pair of leather gloves. If your gloves are too loose, you will constantly be snagging them. This is as annoying as it is easily avoided. If your gloves are too thick, you will not be able to feel what you are doing or properly manipulate the wire. More important than getting the gloves is wearing them. Wire punctures and scratches hurt in a special way. Like dog bites do. So, when cutting wire, always wear both gloves.
I have no photos of cutting wire. Suffice to say, I cut six of each tops and bottoms (36" x 30"), fronts and backs (36" x 16") and twelve side (30" x 16") pieces. A door hole distinguishes the fronts from the backs. The type of wire used indicates top or bottom. All twelve sides are the same.
Eight or so hours later...you have all the pieces cut. It is time to put it all together.
Now you will be using a j-clip pliers and j-clips to put all the parts together. I generally begin by fastening the floor and the front wall. Lay the wall (with the side you want facing out up) on the floor with the edges to be fastened atop one another. Fix a clip every 2".
I like turning the cage while I build it rather than moving around it. Turn the cage so you are on one of the two sides. Pivot the front out of the way. So it is not laying on the floor. Lay the side piece in place and clip.
I find it easier to clip the front and side together at this point. This creates the first corner of the cage and gets the pieces already attached out of the way of those to follow.
Turning the cage, clip the back to the floor. With a clip create the second corner. With three sides and two corners standing, turn the cage and fasten the remaining side.
Go back and add clips to strengthen the corners.
Next add the door. You will need a 14" x 13" piece of mesh for each cage. The four rolls of wire do not provide enough mesh to cut doors. I had just enough 16ga 1/2" x 1" wire left over from building nest boxes to cut six doors. It is important that the door be mounted to open in and not out. You can see the door is j-clipped into place. It will swing freely in but cannot open out. A short piece of wire and a twist will hold the door shut.
Put the top on. I find it easiest to first clip each corner. Then clipping every 4", secure the top.
There you have it...a rabbit cage.
Depending upon what kind of feeder and waterer you use, further cuts may be required during installation.
You may have noticed I never mentioned actually measuring anything. Wire is an inexact and forgiving medium. Count the spaces between wires. If the space is an inch.... if it is half inch... You get the picture. Often using a measuring tape would have you cutting between parallel wires. Because this makes no sense and you are working with measured wire, just count the correct number of spaces. Everthing will fit.
Also, if you make a bad cut, do not freak out. Wire bends. You will be able to adjust. A perfect cage keeps in what one wants in and out what one wants out. Imperfect corners or a ripple here and there will work themselves out once the weight of the rabbit is on the floor.
I made hay racks from the wire pieces I cut out of the front for the door opening. These too I fixed with clips to the exterior of the cage.
As for the rabbits themselves, the litter of nine is hopping out of the nest box like so much Jiffy-pop. They are munching on hay and mom's pellets and appear to be trying to figure out what the waterer is for. Weening should be no problem.
The litter of fourteen is eyes open. I saw the first trail-blazing bunny stumbling around the mother's cage today. I put it back in the nest with no complaint from mother rabbit. All are still alive.
Thanks for stopping. Come again soon.
Yes, it has been a while. I've been busy doing the actual work about which I blog. Today, I will show you how I build rabbit cages. Rabbits grow quickly. I will be keeping two does and one buck from each of the two litters. This means six new breeding cages.
First, set up a sturdy work surface. Make it large and flat. I use a 4' x 8' x 3/4" sheet of underlayment laid over a couple old, garage caliber cabinets. Whatever you choose will be left scratched and gouged. Have a chair nearby. You will need it.
 |
| A large, sturdy work area is vital |
Get yourself a good diagonal wire cutters. A thin nose is good as it allows you space when cutting close wire. Do not use a needle nose pliers. If you need a reason...try it, you will find one when you begin to cut the first floor piece from the roll. I cannot stress enough the importance of the wire cutter. Having built other cages with a sub-standard (made in China) cutter, I gladly bought an American made, American steel, cutter with a comfortable handle. It is necessary that the cutter be made of harder metal than that which you are attempting to cut. DO NOT PURCHASE CHEAP TOOLS! You will pay in other ways. BUY AMERICAN. BUY LOCAL.
 |
| The requisite tools and fasteners |
I have no photos of cutting wire. Suffice to say, I cut six of each tops and bottoms (36" x 30"), fronts and backs (36" x 16") and twelve side (30" x 16") pieces. A door hole distinguishes the fronts from the backs. The type of wire used indicates top or bottom. All twelve sides are the same.
Eight or so hours later...you have all the pieces cut. It is time to put it all together.
 |
| There is going to be a lot of this |
 |
| Lay the front over the floor and clip them them together |
 |
| Floor with front and one side fastened. |
 |
| Floor with front, one side and a corner. |
 |
| Front, one side and the back with two corners. |
 |
| All four sides in place. |
 |
| Put the door in before installing the top. It is just plain easier. |
 |
| One finished cage. |
Depending upon what kind of feeder and waterer you use, further cuts may be required during installation.
 |
| 5" in the world of wire, is not equal to 5" in the world of feeders. Wire bends to fit. |
 |
| 5" rabbit feeder in place. |
Also, if you make a bad cut, do not freak out. Wire bends. You will be able to adjust. A perfect cage keeps in what one wants in and out what one wants out. Imperfect corners or a ripple here and there will work themselves out once the weight of the rabbit is on the floor.
I made hay racks from the wire pieces I cut out of the front for the door opening. These too I fixed with clips to the exterior of the cage.
 |
| On the right is the wire removed to make the door hole. One the left, that same wire in a useful shape. When bending wire, use a needle-nose pliers. |
 |
| The hay rack fixed to the cage. |
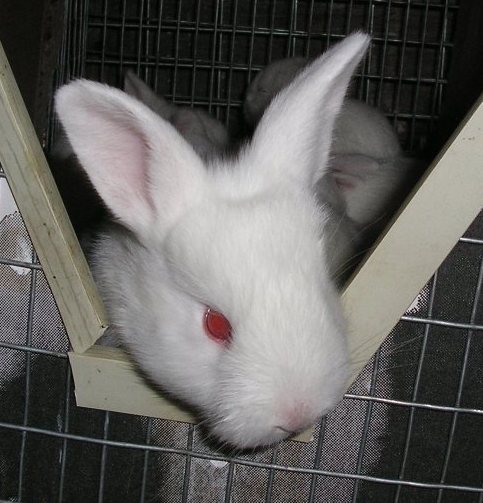 |
| One of the original nine kits. |
 |
| The second litter trail-blazer bumbling about. |
No comments:
Post a Comment