Sunday, July 1, 2012

Shak Rabbits


Welcome back to The Shak.


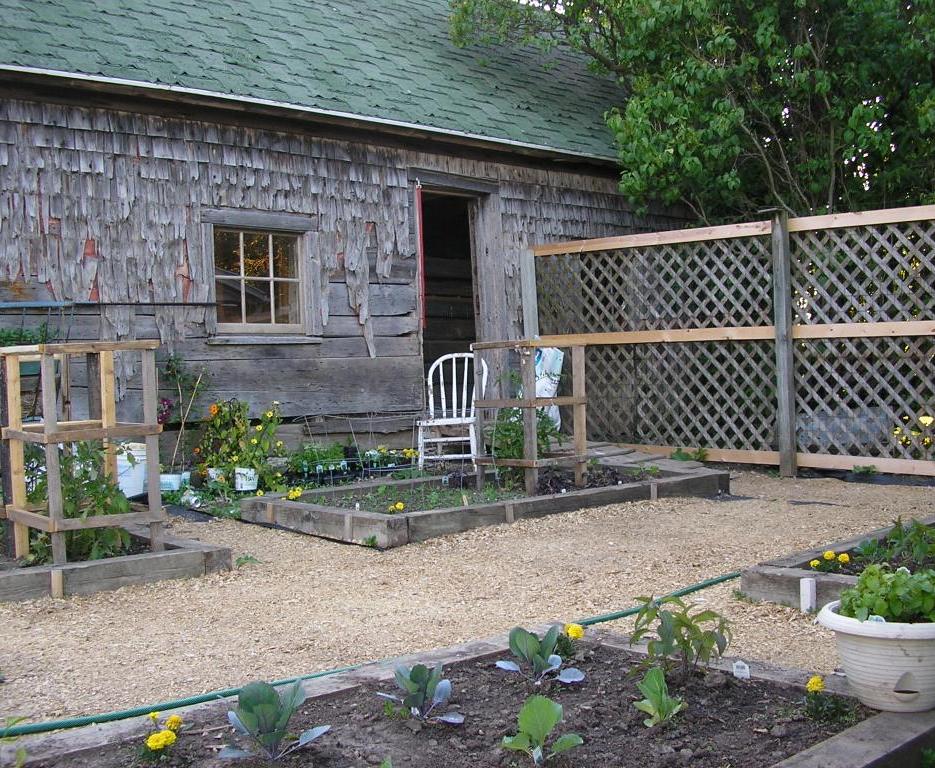
So, I have this little brown brick building three-quarters enveloped in lilac and tall grass. The inside walls are soot covered. Up until recently, it, like all the other buildings I have been reclaiming, was a catch all for stuff which had outlived its usefulness. From my point of view, it benefits from its lack of size. Measuring roughly 6’ x 6’ on the inside, it just cannot hold very much; therefore, I have less to clean.

I will say this. There was a theme and logic to what found in that building. Yard/Garden. I had re-commissioned all tools of use by March, when I began cleaning the courtyard. What was left leading 
up to Memorial Day weekend, disappeared. It was burned, recycled, reused, re-purposed, composted or land filled.
Having an empty brick box with a wooden top and door in-and-of-itself is nice. But doing something with it is exciting. Especially when one has a good pile of not-too-dry apple wood, a couple whole fryer rabbits in brine and a few hours on a beautiful Saturday afternoon in May.


You may have guessed what I’m up to here. It is a smokehouse. I will use it as such.


Once cleaned, I put an old car rim on the floor. This will contain the fire. The idea is to have a small smoky fire which over time brings the meat to 160 F. Using apple wood sticks I got the fire going, eventually adding larger, wetter sticks which act to increase smoke at the expense of flames. I find the heat of coals far preferable to the heat of flames in this application.


Before any fires can be lit, the meat needs to be prepared for smoking. Earlier, I mentioned brine. The meat must first be soaked overnight. To make brine is to dissolve salt in water. I use 2 cups of salt to 1 gallon of water. Having soaked the meat in a covered, plastic container in the back hall from noon to noon, I rinsed the meat, patted it dry and seasoned it.
Lemon pepper and Tri Color Sage

Lemon pepper
There is really no limit to seasoning possibilities. I chose to season one with only lemon pepper. To the other I added fresh Tri Color Sage to the lemon pepper. This I secured with a piece of string. I also put a few sprigs inside the rib cage and belly.  With this the meat is ready to go in.
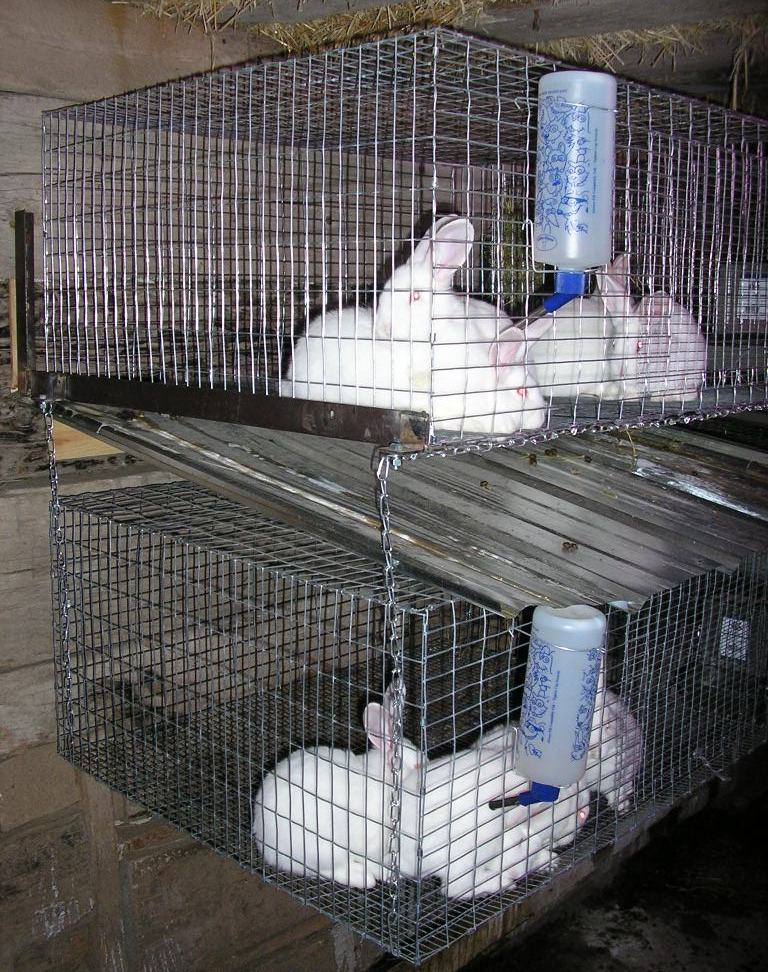
Fire is going.
Rabbits are in.
I learned that placing whole fryers on a rack is probably not the best way to do this. The front legs, being so much smaller than the rear, reach temperature sooner and dry out. I see two good solutions to this problem. I could cut the rabbits or I can wrap them in string and suspend them front legs up from chains and hooks screwed to the rafters. Next time I’ll hang them.

It took about three hours of constant vigilance before they were done. I had to monitor the fire and add wood as necessary. I spent the rest of the time on a lawn chair in the shade of an overgrown apple tree with some of the chickens.


Lemon Pepper with Tri Color Sage
Lemon Pepper
Never having smoked or tasted smoked rabbit, I was happy to find that it had the taste and consistency of ham. It was just in a smaller package. Counting my first experiment a success, I expect even better results next time. With the garden growing, I now have a good selection of fresh and dried herbs. That will be a game-time decision.


If anyone can tell me why some of the words have a white background and/or why these ad-links are showing up in the text, I would appreciate any advice on making both go away. I can find no reason for the white background and if I wanted ad-links in the body of my blog, I would put them there myself.


Thanks for stopping. Come again soon.

Shak Rabbits


Welcome back to The Shak.


I have been busy. Yet, I am behind. Well, with blogging anyway. I have files of pictures blog-ready. The text is the problem....and this post is text heavy. Today is the fourth overly-hot, sunny day on end. Thought I would give my skin a rest, soak up some fluids and blog a bit.


Having so many things to blog about, I choose to keep it chronological. So, let’s get in the Way Back Shak and return to early May, 2012.


First of all, I would like to thank my friend and brother-in-law, Marty Mueller.  He is an avid outdoorsman who has just shy of infinitely more experience with slaughtering animals than do I. Not too mention, his eyes lit up when we talked about my raising rabbits for meat. He knew this day would come. Interesting how that same thought brings me to a different place.


On May 5th, Marty came over with the tools and know-how. Together we slaughtered the five rabbits remaining from the first litter. Due to my lack of practical knowledge, I knew what we needed; I did not know what to do with it. After having slaughtered those first five and coming to understand what facilities are required to do it quickly, cleanly and humanely, I found the perfect location for what I would like to show you now. Welcome to the slaughterShak.
Once upon a time the milk house.
Presently the slaughterhouse.
The erstwhile milk house is the location I chose. It has a cement floor with a drain. At present I hose water in when I am using it. There is a water pipe on the other side of the wall in the barn, but it needs repair/replacement. Not even I am crazy enough to sledge hammer cement in ninety-something-degree weather. That is on the list of things to do. For now the hose fills in well. There is a double basin on the left. I salvaged this during the garden cleanup. The legs which originally came with the basin were done. I used the gray shelving legs you see holding the basin. Those I found amongst the clutter in the milk house while cleaning it. Held together by two diagonally run lengths of chain, the whole thing is quite sturdy. It holds water very well. A couple old wine corks plug the drain holes as needed.
On the opposite wall is a seriously heavy-duty table. It remains pretty much where I found it while cleaning. I did raise it up about 8”. I am 6’ 3”and like my work surfaces at least 40“ high. Saves me the fatigue of a sore back and shoulders from stooping/hunching. You will also notice the dorm size refrigerator. As I can only bring myself to slaughter a couple a day, it is large enough to cool the carcasses before cutting. Cold meat is much easier to cut cleanly. Generally, I cut the rabbit in six pieces. Two front legs and shoulders, ribs, back and two rear legs. Having done this, I freeze the meat. I was freezing it in a couple layers of freezer paper. That will change with the next slaughter which begins 3 July. From then on, I will be sealing it in food saver bags. With the slaughterhouse refrigerator again empty, I dress a couple more rabbits and get them chilling. And so it goes until I am out of rabbits to slaughter.


I will say nothing of the actual dressing process in this blog. If it can be tactfully and tastefully done, I think that sort of thing lends itself more to video. Yet, if you look closely, you will see a chain with hook suspended from the rafters on either side of the center light. There too is a green, miniature “Louisville Slugger”. The chains hold the rabbit for dressing and the Slugger makes them much easier to hook.


I realize the emotions associated with all I have not said, may be causing you problems. I realize this because I live this.

Q: How does one bring oneself to kill an admittedly cute animal, not from a distance as with a gun, arrow or predator drone, but holding it in the palm of one’s hand and hitting it on the base of the skull with a piece of ash?
A: Humanely


After having experienced rabbit screams on the first day, and not knowing who suffered more, me or the rabbit, I found some of the research I had done, which involved holding the rabbit by the back legs, letting it dangle and then maybe getting a clean hit on it was not the best thing for either of us. First of all, I never dangle my rabbits from their back legs; therefore, I assume it is quite a shock for the rabbits to find themselves dangling from their back legs. I read somewhere that one should not kill a frightened/struggling animal if for no other reason than that it tightens the meat. It is also entirely unnecessary and possibly cruel to frighten the animal in the first place.


I found a better way. It has yet to fail me with eight-week-old rabbits. I take the rabbit from the cage in the rabbit barn, pet it while walking to the slaughterhouse. I also talk to it, thanking it for taking care of me in such an absolute manner. Once in the slaughterhouse, I hold the rabbit on my left forearm and hand, gently holding its front legs between various fingers, and pet it with the Slugger which is in my right hand. The rabbit is very relaxed at this point. With one quick, hard, downward swing of the bat, the rabbit tenses slightly. I then place it on the table where it relaxes and goes limp over the span of a minute or so while I contemplate existence. There is some nervous twitching and kicking in some rabbits; however, the rabbit is quite dead on the first strike. And because it is relaxed as opposed to squirming at its moment of death, it is possible for me to hit my mark; thereby making that moment a quick one.


While I am at it, I would also like to tell you this. A couple mornings ago I went out to the barn to feed the minions. One of the does I kept from the first doe's first litter could not move her rear legs. After further investigation, I saw that she had a broken claw and blood on there left rear paw. My theory is this. She got her foot caught on something and broke her back when she hopped. It hurt me to see this. She was not crying or in any visible pain. I did not want to slaughter her. She had been chosen as the best doe of that litter and I wanted her to have a long life. So, a freak accident happened. Now I have a 4.28lb rabbit in the freezer. That is life on the Shakstead.


Why did I tell you that little story? Well, this is a case where regardless of your opinion on killing rabbits for meat, the cruelty would have been in allowing that poor little being to live a slow, lingering death.


Finally, I would like to say this. If you have “problems” with the breeding, raising and slaughtering of rabbits or other animals for meat, I am not interested in arguing with neurotics, so please keep them for your next session with your psychiatrist. Ask that person to explain where food comes from.


Life feeds on life. The problem for some humans is doing so humanely. No such problem exists “in nature“. Neither the wolf nor the tsunami can moralize about being the wolf or the tsunami. I am neither a wolf nor a tsunami. While I do not enjoy killing, we do all NEED to eat.


Thanks for stopping. Come again soon.

Sunday, June 10, 2012

Shakstead

Welcome back to The Shak.


Maybe I should not have let so much time pass since my last blog. I've been busy with the doing which leads to the blogging. It is too hot to work outside or fish this afternoon. So, I'll get started. There is much about which to catch you up.
June 6, 2012


Bed 1: Early Girl Tomato, Eggplant,
 Alaska Pea, Purple Ruffles Basil,
Red Rubin Basil and Marigold

Bed 2: La Roma Tomato,
 Long Island Dill, Florence Fennel, Marigold
and Green,Yellow and Red Bell Peppers
Bed 3: Beefmaster Tomato, Mammoth Dill,
Brussel Sprout, Onion, Cinnamon Basil,
Tricolor Sage and Marigold
Bed 4: La Roma and Sweet 100 Tomato,
Brussel Sprout, Onion,
 Pineapple Sage and Marigold
Bed 5: Red and Green Cabbage,
Kohlrabi, Banana Pepper, Onion,
Pineapple Sage, Coriander,
Cilantro and Marigold
Bed 6: Sweet 100 Tomato, Bibb Lettuce,
 Spinach, Mesclun, Fern Dill and Marigold
East Fence: Great Arrow Pea,
Salad and Pickling cucumbers,
 Red and Green Cabbage, Pineapple Sage,
Greek Oregano and Gazania
South Fence: Beans,
Salad and Pickling Cucumbers,
Greek Oregano and Marigold
 Back on April 15, when last I blogged, I was still working on cleaning and getting the courtyard and raised beds ready for planting. Not only are they ready, planting began May 15th. Most plants/seeds were in that day. After a short wait for herbs, they were in about a week later.


Mom planned the garden plantings and plants. She also did most of the planting in the courtyard. I just take care of it all.
The pumpkins are thriving.
The watermelon and cantaloupe did not.
I also planted five varieties of squash in a patch near the apple trees I pruned in an earlier post. The watermelon and cantaloupe I planted between the front of the house and the road did not do well; however, their pumpkin neighbors are thriving. I subsequently dug three trenches where the cantaloupe had failed and planted potatoes. There are four tires of potatoes near the squash as well.
The squash pit, potato tires and apple trees
The potato tires are 15" rim tires. I laid them on the ground placing five seed potato pieces in each. Then I covered them with old straw I removed from a barn stall (there is a separate blog about why I did that coming in the nextish Shak Rabbits post). With that done, I watered the "piss" out of the straw.
Three rows of potatoes. We'll see if these do better than the cantaloupe they replaced.
The potato rows are made on the same principal. I just dug a trench, laid in the potatoes and covered them to ground level with straw, watering them as indicated above.


Incidentally, dad said that the rumor mongers will be talking after seeing me wandering around the property with a rifle... and two freshly dug graves in the front yard. The rifle is a pellet gun. While I own rabbits, I can't abide wild ones. As for the graves, those are just left over dirt from the potato trenches. No need to involve the CSI team. And there you have my one and only "pop-culture" reference. I've never even seen the show...or any of its supposed variants.


There is also a potted herb garden just outside the door to the house. Here mom planted parsley, lemon, woolly and silver edged tyme, red rubin, purple ruffles and cinnamon basil, garlic chives, oregano, sweet marjorum and nasturtium.
Herbs outside the house door for quick access
Thanks for stopping. Come again soon.

Thursday, April 26, 2012

Shak Rabbits

Welcome back to The Shak.


My keyboard is dust covered. Between rain, wind, cold, teaching and tutoring, I had no occasion to use it. I will not bore you with reports of feeding and cleaning. Though I assure you these things happen. Only after having accomplished something do I blog. Here is what I accomplished.


I left off last time with three of the six new cages inhabited. The top three remained unusable due to a lack of sanitation. That problem has been solved. All six cages are now in play.
As I left things on April 9th. 
Three of six cages were habitable.
Rabbits in top cages urinating and defecating on the rabbits in the cages below was the problem. I decided to add a sheet of galvanized steel roofing between the upper and lower cages. This sheet I fastened at a forward slope which overhangs the front of the cages; thus, the refuse falls harmlessly to the floor where I can quickly and easily scrape it away with an old plastic snow shovel, which as fate would have it, is imperfect enough to level out the floor's imperfections.


I will most likely add a "gutter" and "downspout" in the near future. I needed the cages to function as cages. I needed them now. Aesthetics will wait.


My first step was to dismantle everything I had built. All the pieces will still be used, but I had to make certain changes. I welded two small brackets with a 5/16" hole drilled in each to the original L brackets. These additional brackets hold the chains suspending the lower cage. They also serve to widen the area between the chains allowing the steel roofing to sit comfortably between them, thus covering the entirety of the lower cage.
You can clearly see the steel roofing sloping forward
and overhanging the lower cage
in this picture of the first finished duo.
The galvanized roofing is 36" wide plus about an inch of overlap on each side. This makes it the perfect width to cover the 36" wide cages. I cut the steel to 38" long. It slopes downward from back to front. Being mounted to a 1" x 4" pine board on the wall behind and below the top cage, it slopes down to rest on the top front of the lower cage.
Front picture of the third duo of cages. Notice the tensioning chain running below the top cage and between the brackets.
When installing the whole thing, I began by bending the top link of the chains to a 90 degree angle. This allows the chain to hang well. Slipping the end link over a 5/16" bolt and using a lock washer, I bolted the chains to the brackets before mounting the brackets to the wall. The space becomes very confined once the brackets are affixed.
This is a detail picture of the right bracket of the final pair. You can see both suspension brackets, hardware and chains. The chain going off to the left is the tensioning chain to which the bottom front of the top cage is j-clipped.
After mounting the brackets to the wall, I bent some 4" pieces of 16ga. wire into clips. These I hung from the lowest chain link and fastened to the bottom of the lower cage. Four clips and four chains later, the lower cage hung suspended from the brackets.
Rather a blurry picture;
however, it shows the clip
which is what I wanted you to see.

A clip and chain fixed between the bracket
and the bottom of the lower cage.
At this point, I screwed the 1" x 4" pine board to the wall slightly below and between the two brackets. Next, I slid the steel roofing into place  upon the pine board, below the brackets and resting atop the front top edge of the lower cage. Happy with it's placement, I screwed the roofing to the pine board.
Here you see the bracket with chain,
 the steel roofing at its angle and
the pine board to which it is screwed.
With the roofing in place, I cradled the top cage between the brackets. A piece of chain between the two front chain bolts, pulled the brackets tightly against the sides of the top cage. I then j-clipped the chain to the bottom front of the top cage. The cage cannot slide in any direction and will not fall until the walls around it do.


To mitigate the swinging inevitable when using chain, I also j-clipped each suspension chain as high up on the side of the cage as space and my patience allowed. The lack of space obviated any pretense to perfection.


With the first two cages done, I moved on to the second and finally the third duo. As is so often the case, the first pair took longer than the second and third pairs combined.


Having installed and filled a feeder and a waterer in each of the top cages, the second doe's bunnies now have a place to call home if only for a short time.
Six serviceable cages. The closest cage pair houses the first doe's progeny. The rest hold that of the second doe. That is a total of twenty-one bunnies.
By short time I mean, aside from the six I select for breeding, the rest will be available for live sale or meat; whichever you prefer. Both does have already been re-bred. The first one is more than half way through her second pregnancy with the other doe ten days behind.


I will cover all this very soon. When I share with you all the reasons you should be mixing some rabbit into your diet and how I can help you with that.


Thanks for stopping. Come again soon.

Sunday, April 15, 2012

Shakstead


Welcome back to The Shak.


Since hanging the gate, forming the ramp and laying the retaining blocks at the entrance to the courtyard on the 29th of March, I have done little but pass through on my trips to and from the barn.


When I built the gate, I set it lower than the surrounding ground. This helps keep out vermin, but it also creates a low spot. Water being what it is, this could be a problem.
This picture was taken March 29th.
I am not an engineer. I just do things after thinking about them. Having put the problem somewhere in the back of my mind on the 29th of March, I called the solution to mind today.


If I reduce the surface area that drains to the low spot, I can reduce the chance of water pooling there. Toward that end, I made the top of the ramp the highest point in the courtyard. From that point the ground now slopes slightly toward the fences. The only water the low spot should get is what falls directly upon it and the ramp. If ever enough rain falls that it pools, it will do so in a shallow trench along the periphery of the fence.
The highest point is the far corner of the left bed.
From there the ground slopes toward the fence.
How do I know this is how things will work? I removed or added soil; thus, achieving roughly the slope I wanted. This was done by eye using the lower horizontal fence boards as my level. Overall, I removed a lot of dirt to a pile on the opposite side of the building.


Hard work done, I flooded the entire area with the hose. This not only helps compact the soil, it shows me the flow of the water. Once flooded it also showed me where flow ended and pooling began.
The causway is the darker area
 outside of which is the shallow trench.

Another shot of the causeway,
 running from the just visible corner of the raised bed to about a footand a half from the fence.
Using the pool as my level, I threw shovels of dirt into the water. I added enough dirt to create a causeway slightly above the pool following the right angle of the raised bed to about a foot and a half from the fence. What better level than water itself? I tamped the soil with the shovel and added more soil where it had become water saturated. The causeway will become the path. The shallow trench will be sown with runner beans.


Most of the water had drained by the time I finished shoveling dirt and finding the camera. So, drainage does not appear to be a problem.


I also laid some weed barrier. I only mention that because I think these pictures are cool and sometimes I like to mention the obvious. I'll have the courtyard done before planting season.
March 29th

April 14th
Taken with my back against the north fence. April 14th
Thanks for stopping. Come again soon.

Wednesday, April 11, 2012

Chicken Shak

Welcome back to The Shak.


I have been busy with other things since I built the chicken's nest boxes. Today, I got around to building roosts. It was an easy though somewhat time consuming process.
The coop before I began work on the roost.
After collecting some scrap lumber from the barns, I cut two pieces of wood for the rear, longer legs. These I cut to the height of the bottom of the nest boxes. This puts the highest roost just above the level of the lower nest box openings.


I cut two other pieces for the front, shorter legs. The length of each was half the piece of wood I cut. They amounted to just over 10" each. It was not important to me that they be any specific length.


Then I cut two pieces with the appropriate angles on each end to connect one longer leg and one smaller leg. These I screwed together with biscuits I cut from pieces of scrap 1" x 4" pine boards. This gave me the two end pieces I needed to connect the roosts across.
One of two end pieces. Roost poles will be nailed to these.
I recycled the poles I used for the roosts from the old chicken coop on the opposite end of the same building that houses the new coop and rabbit cages. This building is over one hundred and twenty five years old. A wall of horizontal logs divides the old coop from the current coop and rabbit area. The problem with the old coop is that one corner of the building is pulling apart. The work it would have taken to repair the building and use the old coop was prohibitive.
You can see where the stone foundation eroded and the building shifted. The logs are pulling apart at the corner and the front is buckling. I welcome suggestions about fixing this. As you can see, this picture was taken even before I began fixing the fence.
I laid the roosts across the ends I built, nailing them together 10" apart. It is rare that I use nails. In this case I made an exception.
Legs and roost poles in place. I think the chickens would have been outside in the courtyard had I not been tearing up their coop. They are inquisitive creatures.
Having a standing structure, I wrapped the outside vertical walls with 16ga. 2" x 4" wire. I only chose this because I had enough lying around to complete the job. From underneath, I stapled chicken wire to the roosts. This done, the chickens will not be able to access the area below the roosts by any means.


Because the chickens will be roosting there, their droppings will collect on the floor below the roosts. I do not want them playing in or eating poop. Can't blame a guy for that.


I used chicken wire under the roosts in case they would happen to lay eggs on the roost. This will keep the eggs from dropping through to the ground and breaking while allowing poop to drop to the floor.
No sooner finished than used. Yet another success!
After positioning the roost, which can be moved for cleaning, I removed all bedding from the coop, spread new bedding, re-positioned the feeder and waterer and rehung the heat lamp to a few feet off the lower end of the roost. At this point, the chickens are probably fine without the lamp, but there is a freeze warning tonight and with all the changes I made to their environment today, I did not want to stress them.
Done!
With that, I cleaned up my messes and headed for the shower. Then I ate the ice cream and strawberries I had so been looking forward to.


Thanks for stopping. Come again soon.

Monday, April 9, 2012

Shak Rabbits

Welcome back to The Shak.


I hung the second row of cages. It was a pretty simple process. First, I bent wire into hooks. These hooks I hung through holes I drilled in the long ends of each L bracket. The hooks not only hold the cages below, but also secure the cages above from sliding off the brackets.


From each hook, four per cage, I hung a 20" piece of chain. I ran the chain through the inside corners of the hanging cages and secured if with wire under the cage bottom. If you recall my post on building the cages, I used a sturdier wire for the cage floors than sides or tops. It only makes sense to suspend the cages from their strongest points. These points are the corners of the floors.


With the cages hung, I added the feeders, waterers and rabbits. I removed all eight rabbits from the first litter from mother rabbits cage, putting four in each of two new cages. Their eating pellets and drinking from waterers indicates that mom is not as important as she once was.
Two rows of cages in place. Two cages furnished with feeders and waterers and each inhabited by four rabbits.
I put four in each cage so they could benefit by each other's warmth while at the same time reduce by more than half the number of mouths at each feeder and waterer. I then divided the thirteen rabbits from the second litter, giving the doe of the first litter six of the second does kits to raise. Now, one has six and the other seven kits. Much less of a workload on the second doe.
I also installed three 20" 20W fluorescent lights. Two of which can be seen here. 
I am still working out the details of the "plumbing" system between the rows of cages. That is soon to be completed. I cannot put rabbits in the top cages until I can keep their droppings and urine from getting on the rabbits in the cages below.


The first doe has a date scheduled with the buck tomorrow. She does not know it yet; however, twenty-eight or so days later, more kits. The buck has been waiting a long time for this. One might say it is what he lives for.


You may also have noticed I said eight rabbits not nine rabbits in the first litter. I culled the runt of the litter Saturday night. I found the poor little fella in a pile in the middle of the cage. Breathing, but apparently unable to muster the strength for anything else.


I weighed my options with regard to the little fur ball and decided it's time had come. I had not planned on killing so small a rabbit and it was no fun doing so. In the world of rabbit breeding, however, unlike that of homo sapiens, there is no moral concern with the timely elimination of the weak and nonviable. The only moral concern would be in keeping what should be dead and at peace alive and suffering. Hint, hint United States "medical/legal" industry.


Thanks for stopping. Come again soon.

Shakstead

Welcome back to The Shak.


Over the past week, I have been working on a variety of projects. The courtyard fence is complete. I have also been reclaiming some lawn and pruning apple trees. These last two are what I would like to show you in this post.


One day, I cut the tall grass in what amounts to a triangle between the rabbit/chicken barn, the big barn and the machine shed. Once upon a time, this had all been kept as lawn. Since that time, grass, weeds, red twig dogwood and rogue apple trees took over.
You get the idea.
I have yet to remove the bramble along the barn and silo.
I chose to try turning two rogue apple trees into producers. No one is quite sure how the apple trees got there. Birds are a good bet. But, shielded for years by tall grass, they grew. There was no sign of their ever having been pruned. Because there was so much to them, I thought it worth a shot to prune them.
The center tree is dead. The ladder is eight feet tall.
Now they look like apple trees should. Time will tell if my efforts draw any reward.
There is not much left; however,
 that which is now has a chance.
I also reclaimed about a quarter of an acre of lawn in the front yard. Between tree pruning, tree removal and cutting the tall grass, that is where I spent last Friday. I have no pictures of that to show you. I forgot to take before pictures. Now there is nothing to which to compare after pictures; so, I did not bother with either.


Thanks for stopping. Come again soon.